NFTs Page
The NFTs page has everything you need to manage your project. On this page you can:
- Add NFTs to your project.
- Delete NFTs from your project.
- Automatically rename all the nfts in your collection.
- Download all the metadata associated with your collection.
Add Your First NFT
In these next few sections we will:
- Add an NFT to our project
- Upload an image for our NFT
- Update all the data associated with the NFT
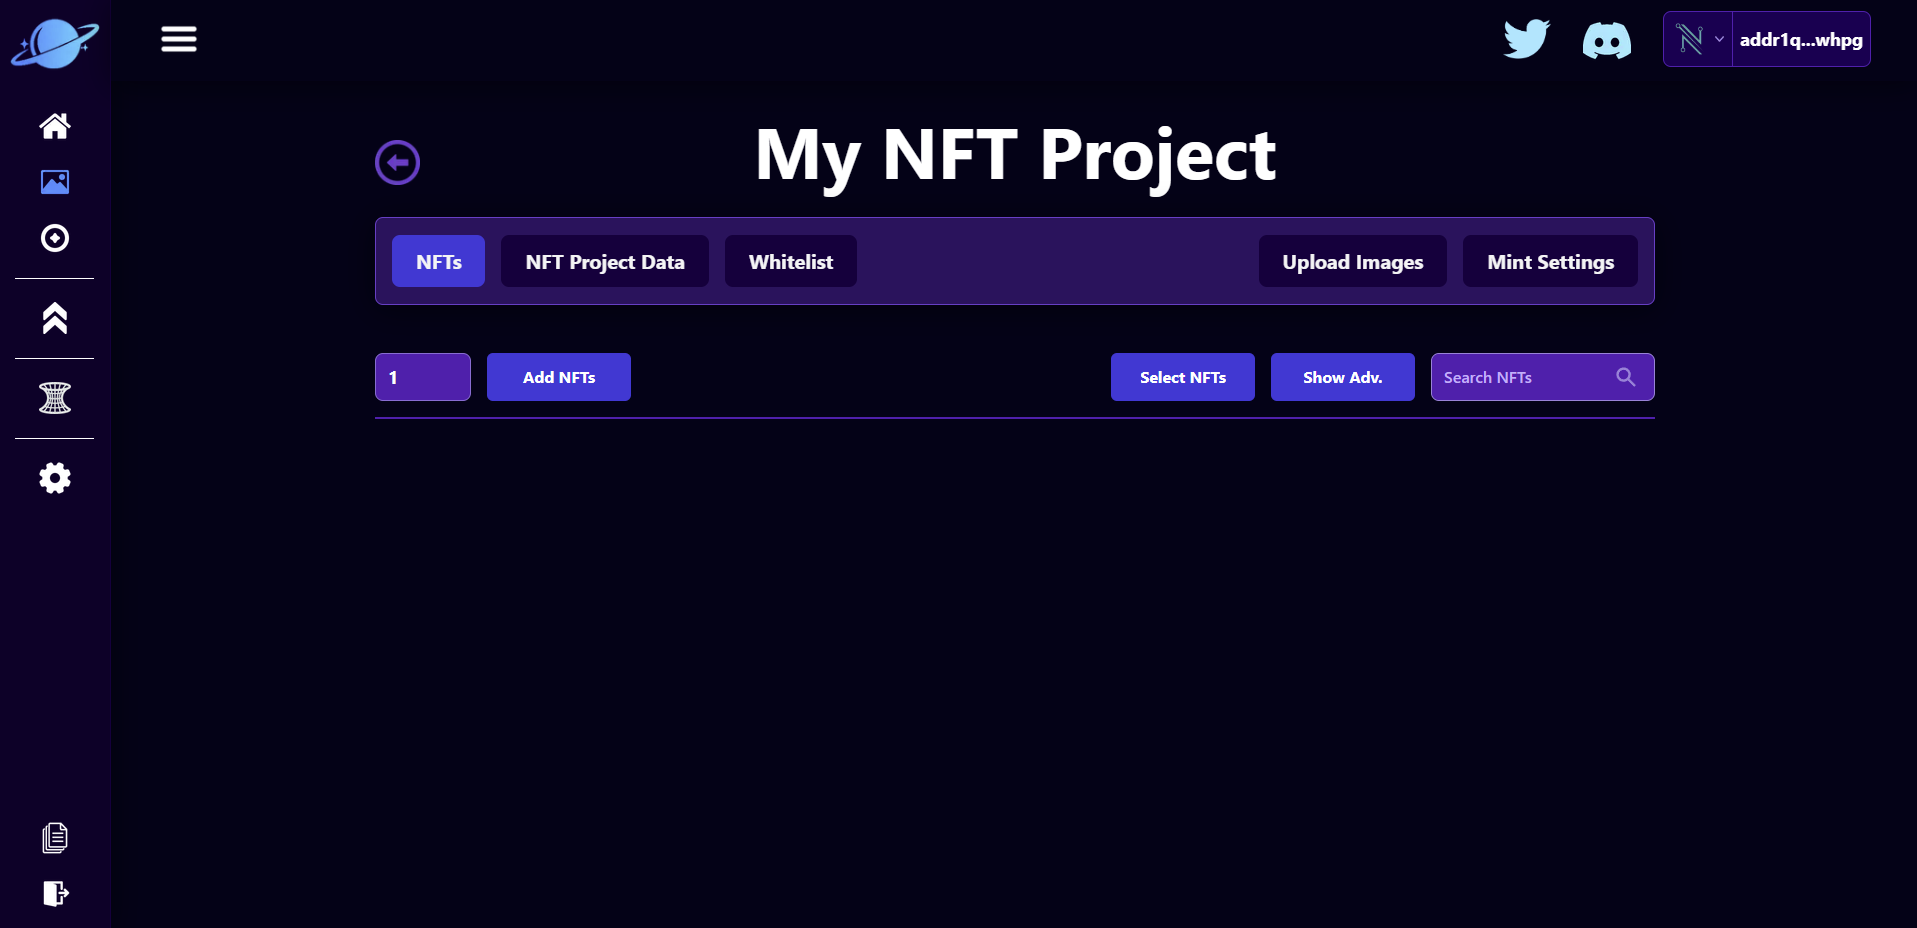
First, we will add an NFT to our project by clicking the "Add NFTs" Button
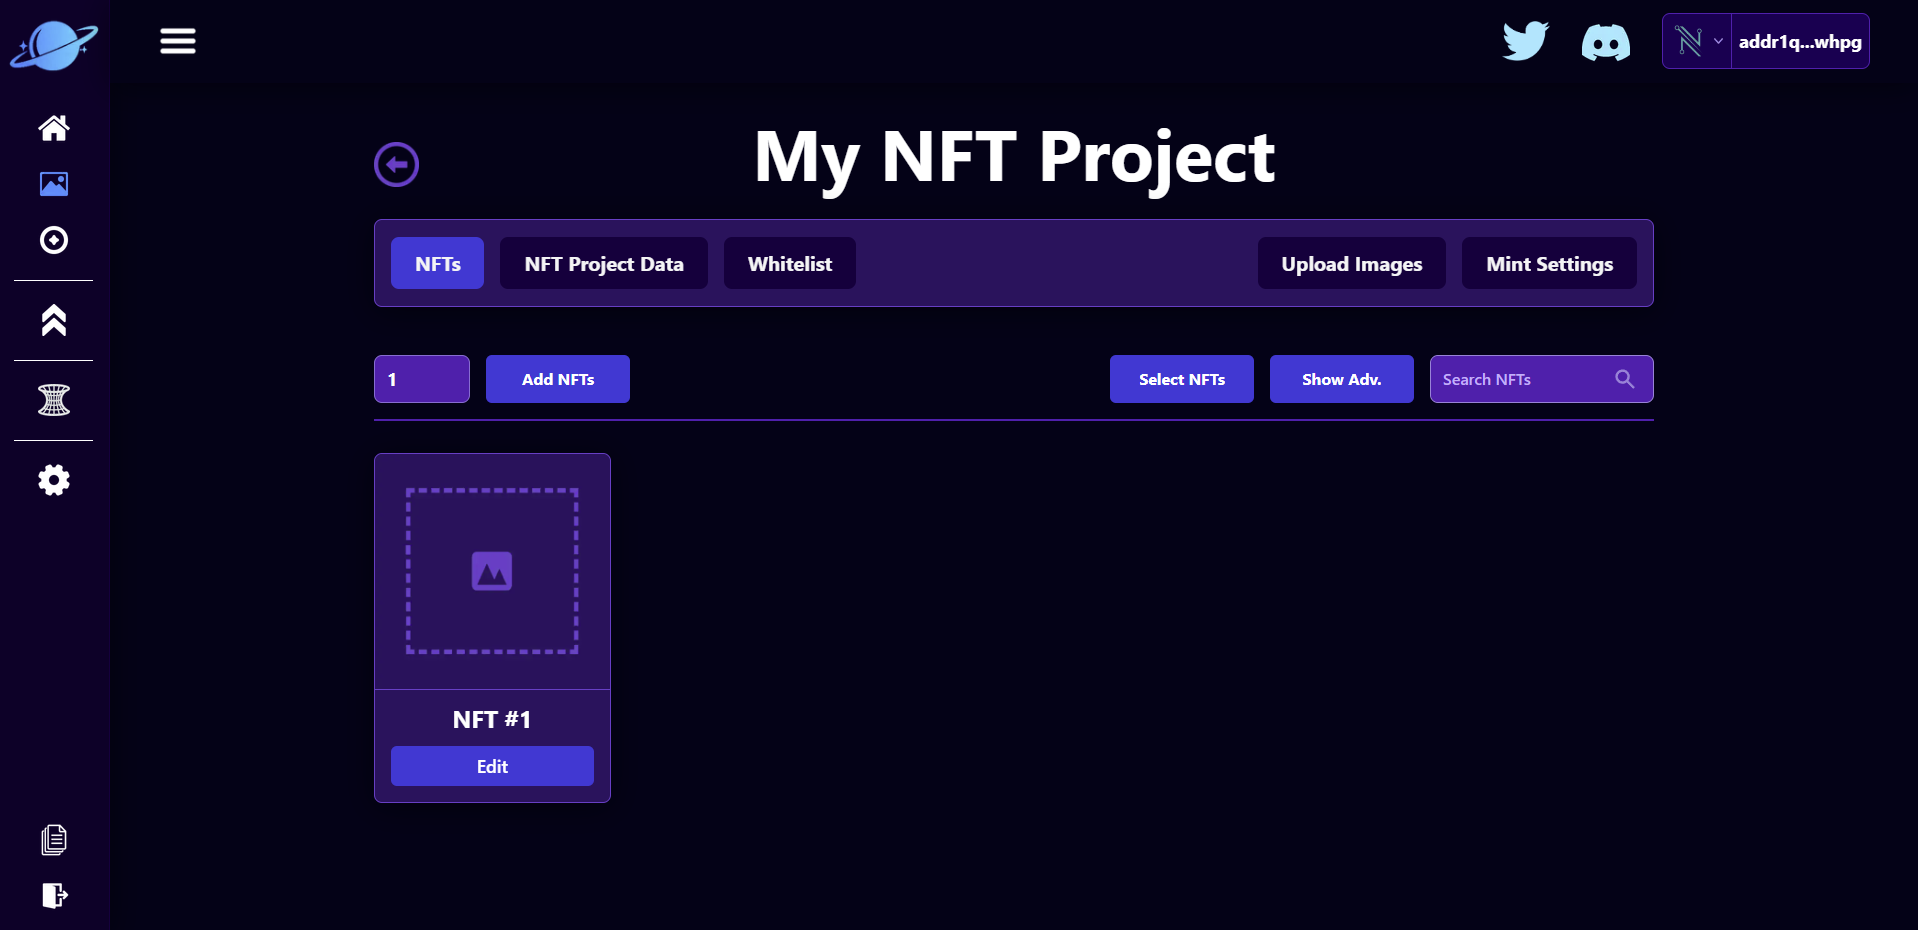
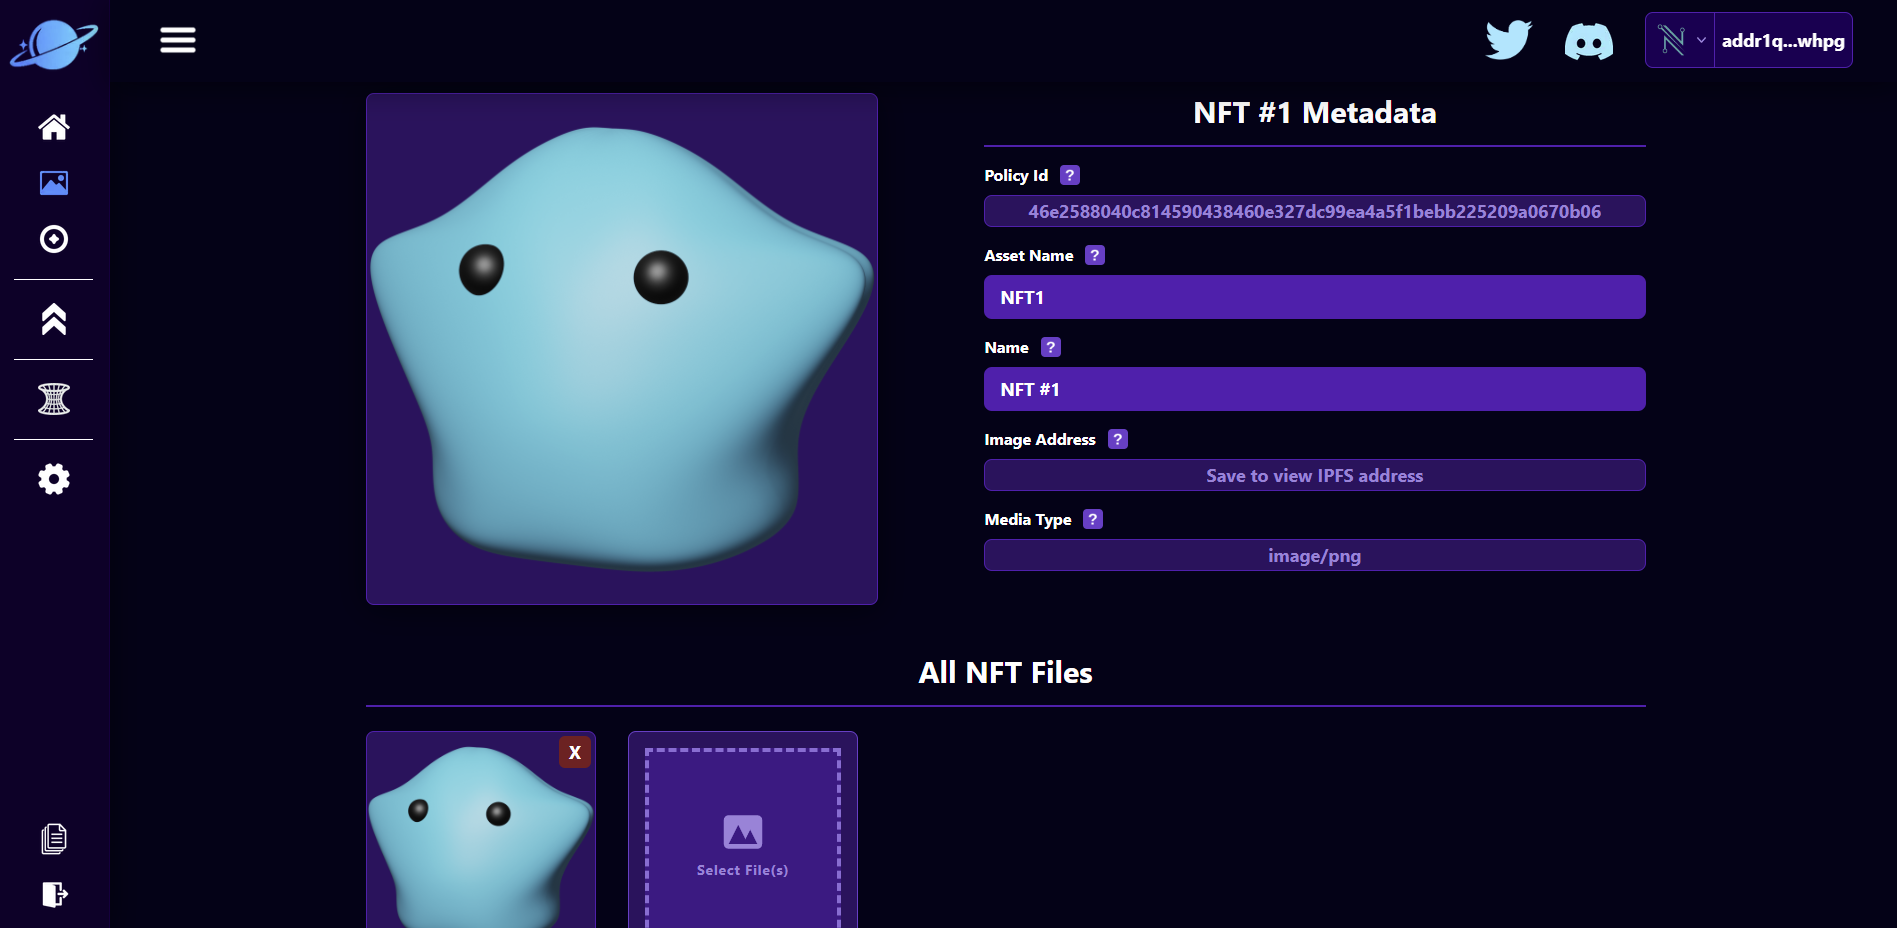
Clicking on the edit button in this new NFT will bring us to this screen where we can edit all of the data associated with the NFT
Uploading An Image
NFTs can be text files, images, gifs, or even video. For our first NFT, we will upload this adorable blob image.
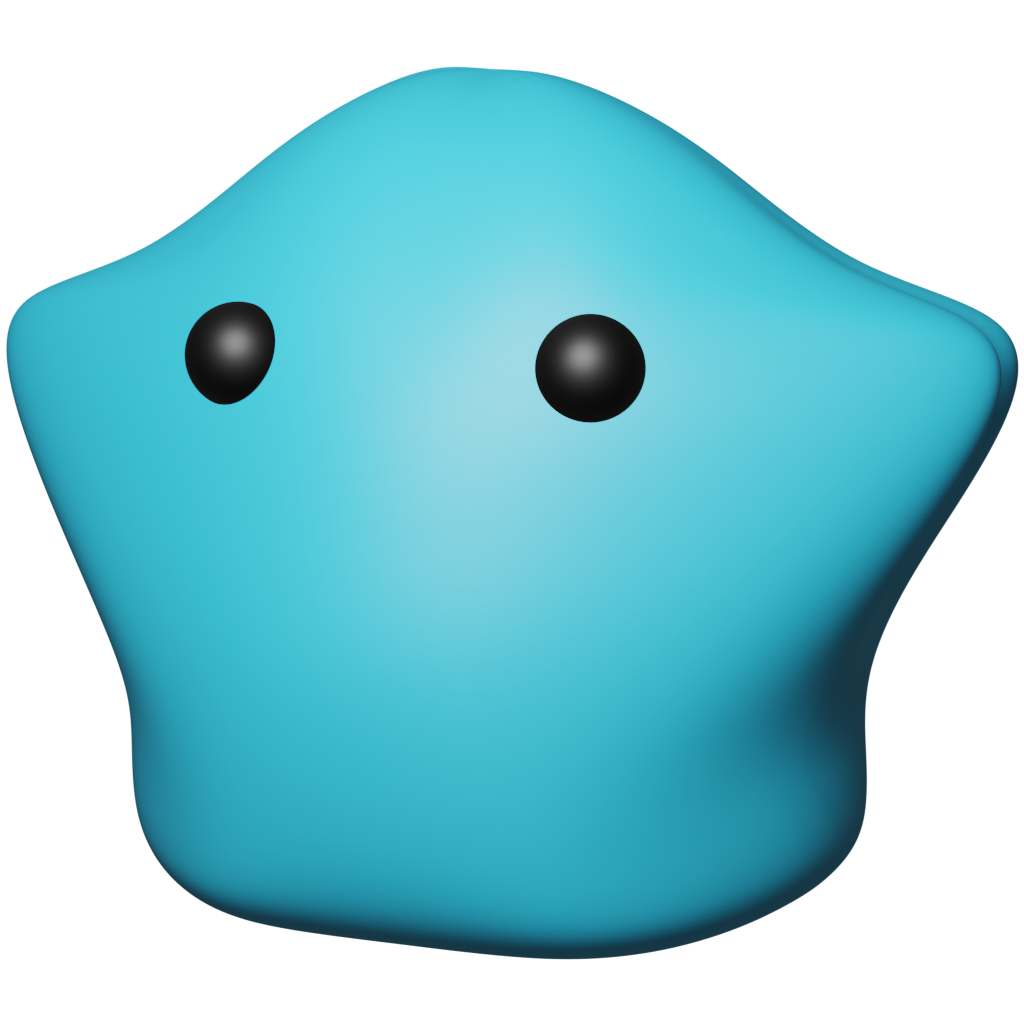
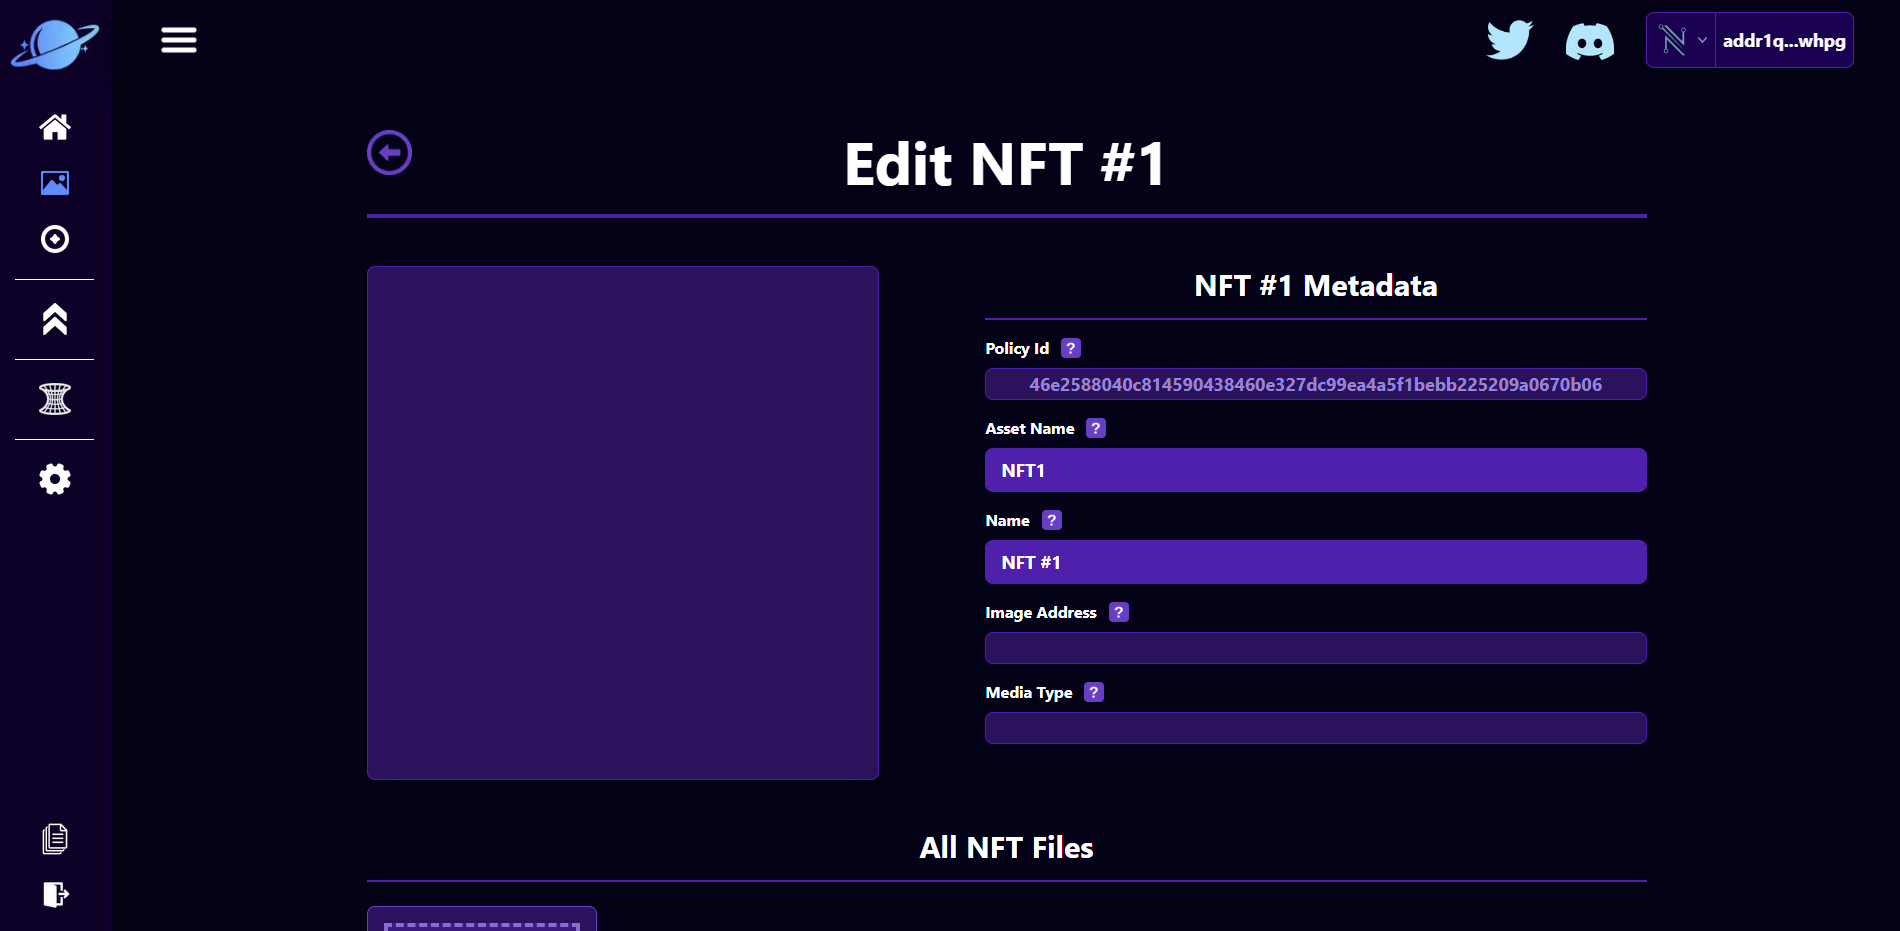
Right click the image above and select "Save image as..." to save the image to your computer. Now click on the "Select File(s)" button to upload the blob image to the Saturn site. Your Policy Id will look different from the image below but, here is what your site should look like after uploading.
Uploading NFT Data
We have 7 pieces of data that we need to have on our NFT. These are:
- Policy Id: This is string of 56 hexidecimals characters that group the NFTs in our NFT project together on the Cardano Blockchain.
- Asset Name: This is the blockchain name for our asset. For NFTs to be "non-fungible" in the policy id grouping, this asset name must be unique.
- Name: This is the visible name that will be shown to the user on various Cardano Dapps.
- Image Address: The image address is the IPFS image link that your NFT image will be stored at. IPFS stands for InterPlanetary File System
- Media Type: The media type indicates what type of file this NFT is which will make it easier for Dapps to display on their sites.
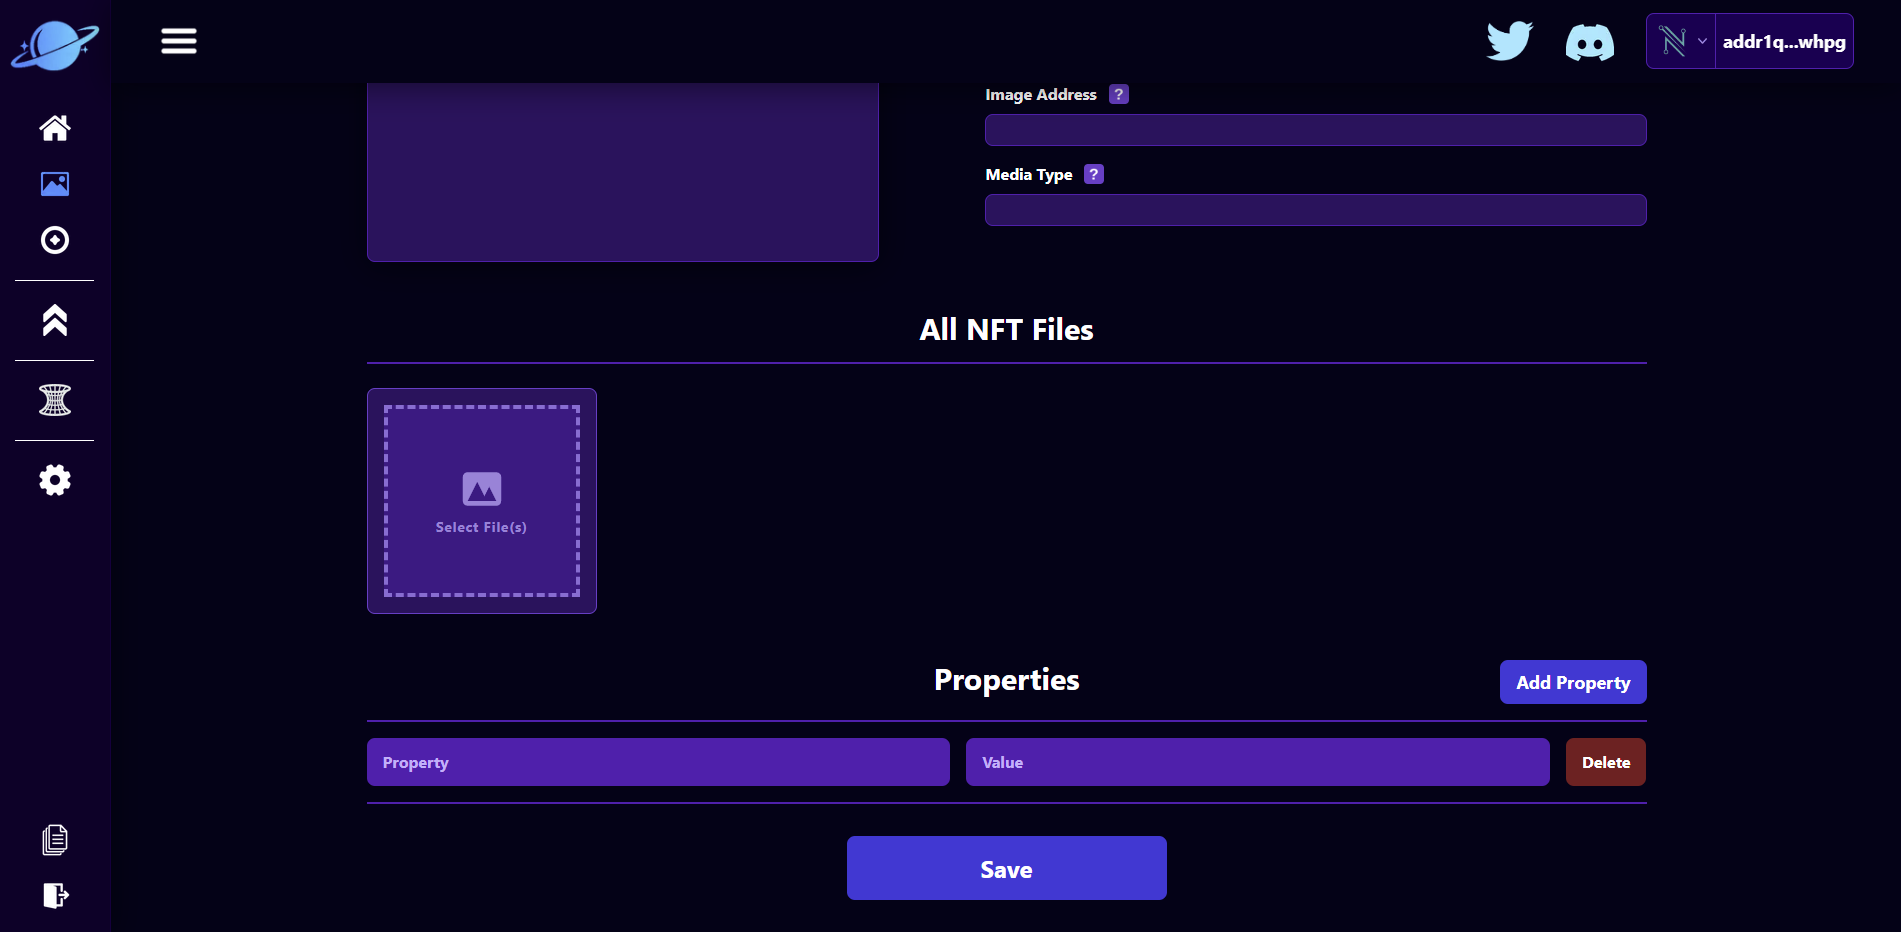
- Files: These are additional files that are associated with your NFT. If you want a secondary file that is a video for example, this would be the field the video is located in.
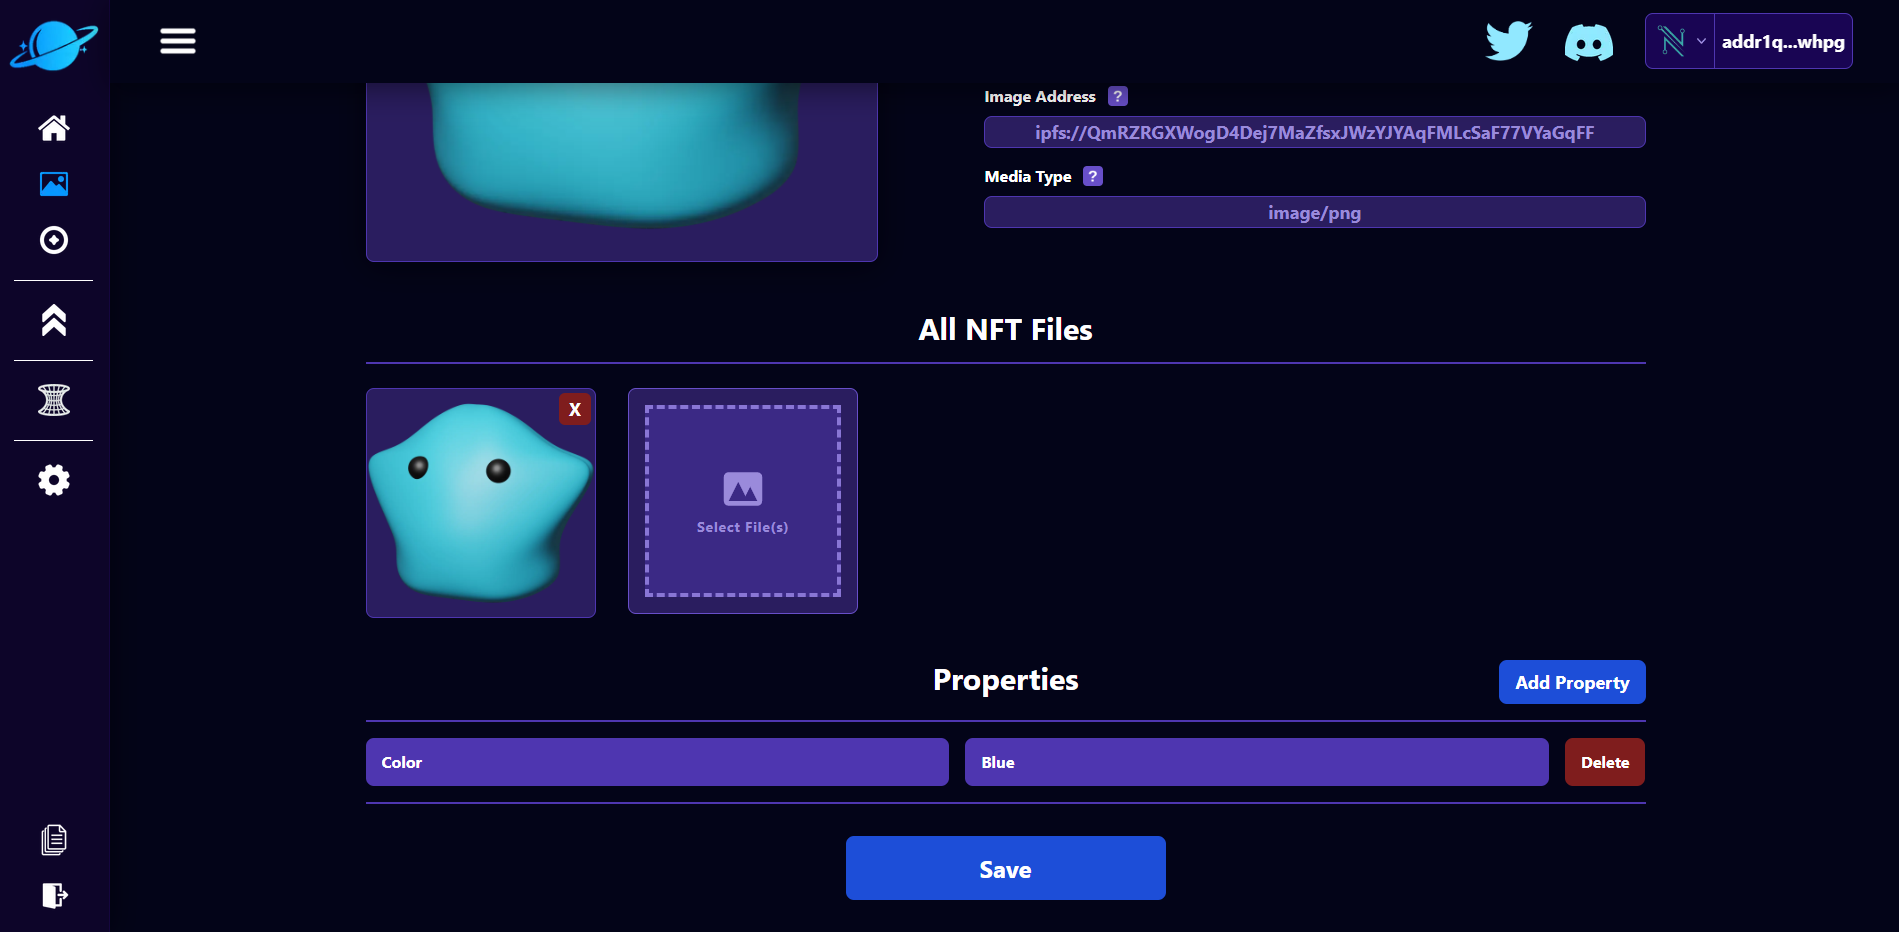
- Properties: These are arbitrary properties and data you can use for your NFT!
Let us update the asset name to "Blob1", update the name to "Blob #1" and add a "Color": "Blue" property to our NFT. Now after saving our NFT, the result will look like this:
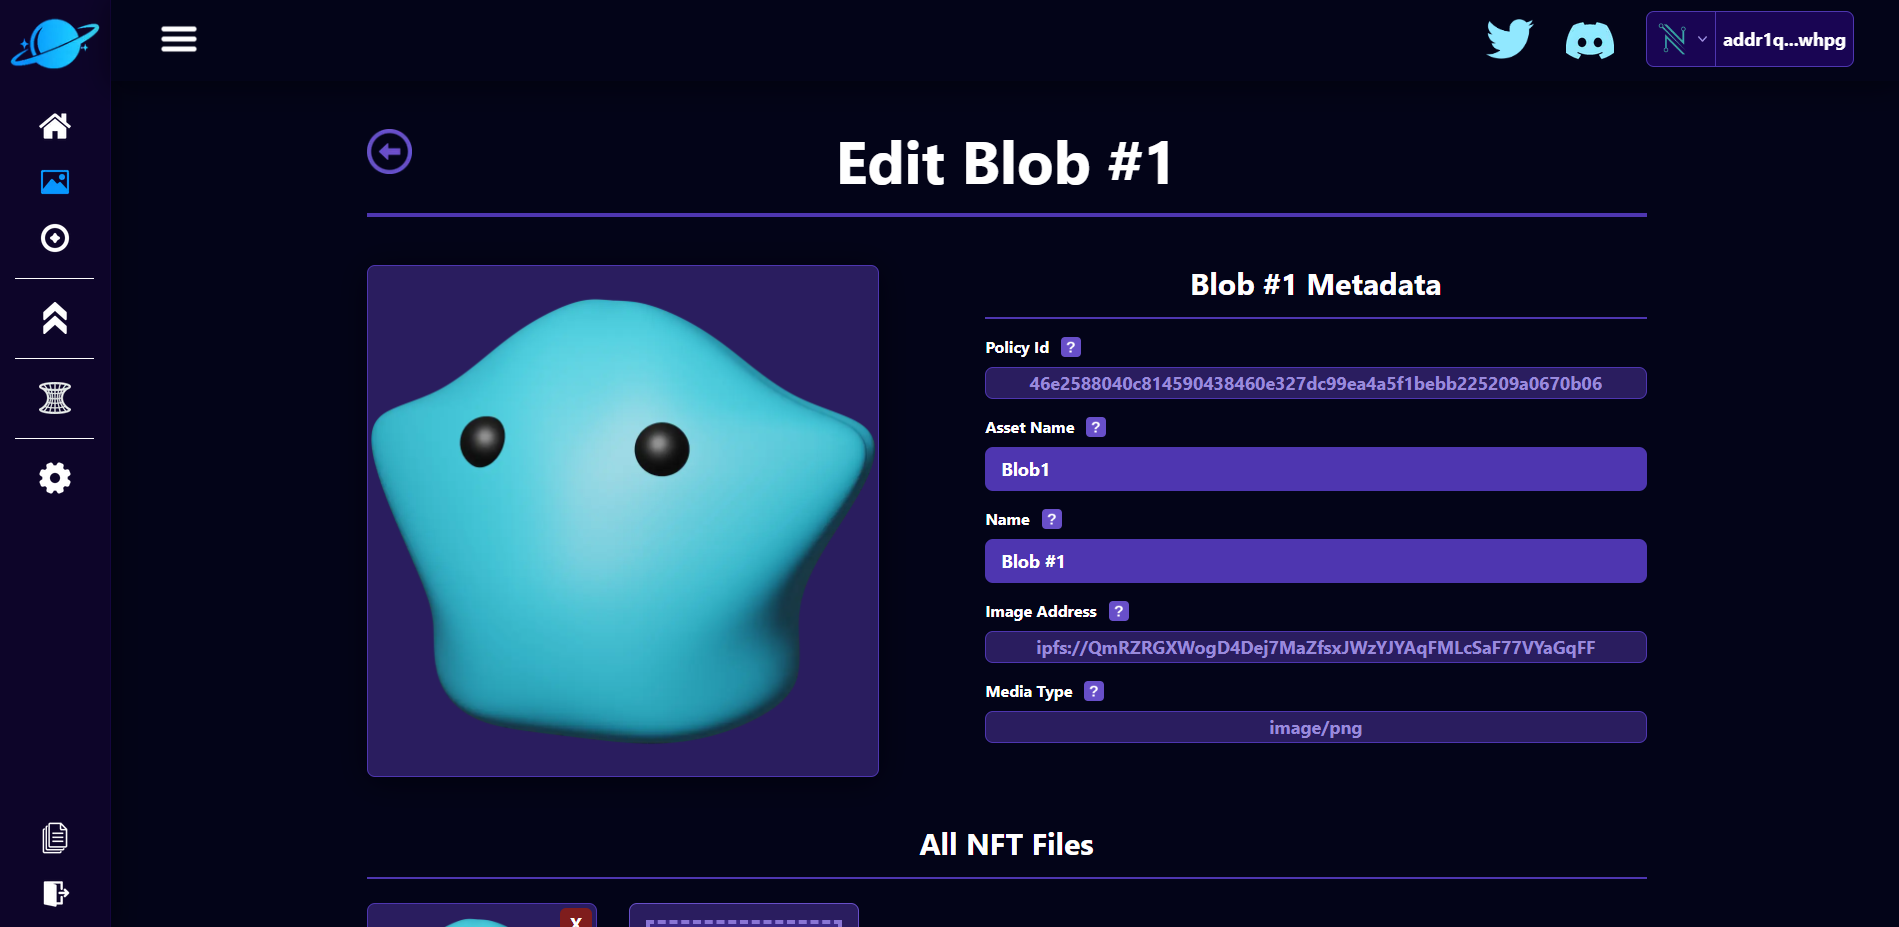
Congratulations! We have set up our first NFT in this project!
Managing NFTs
After hitting the purple back button on the page our nft page will look like this:
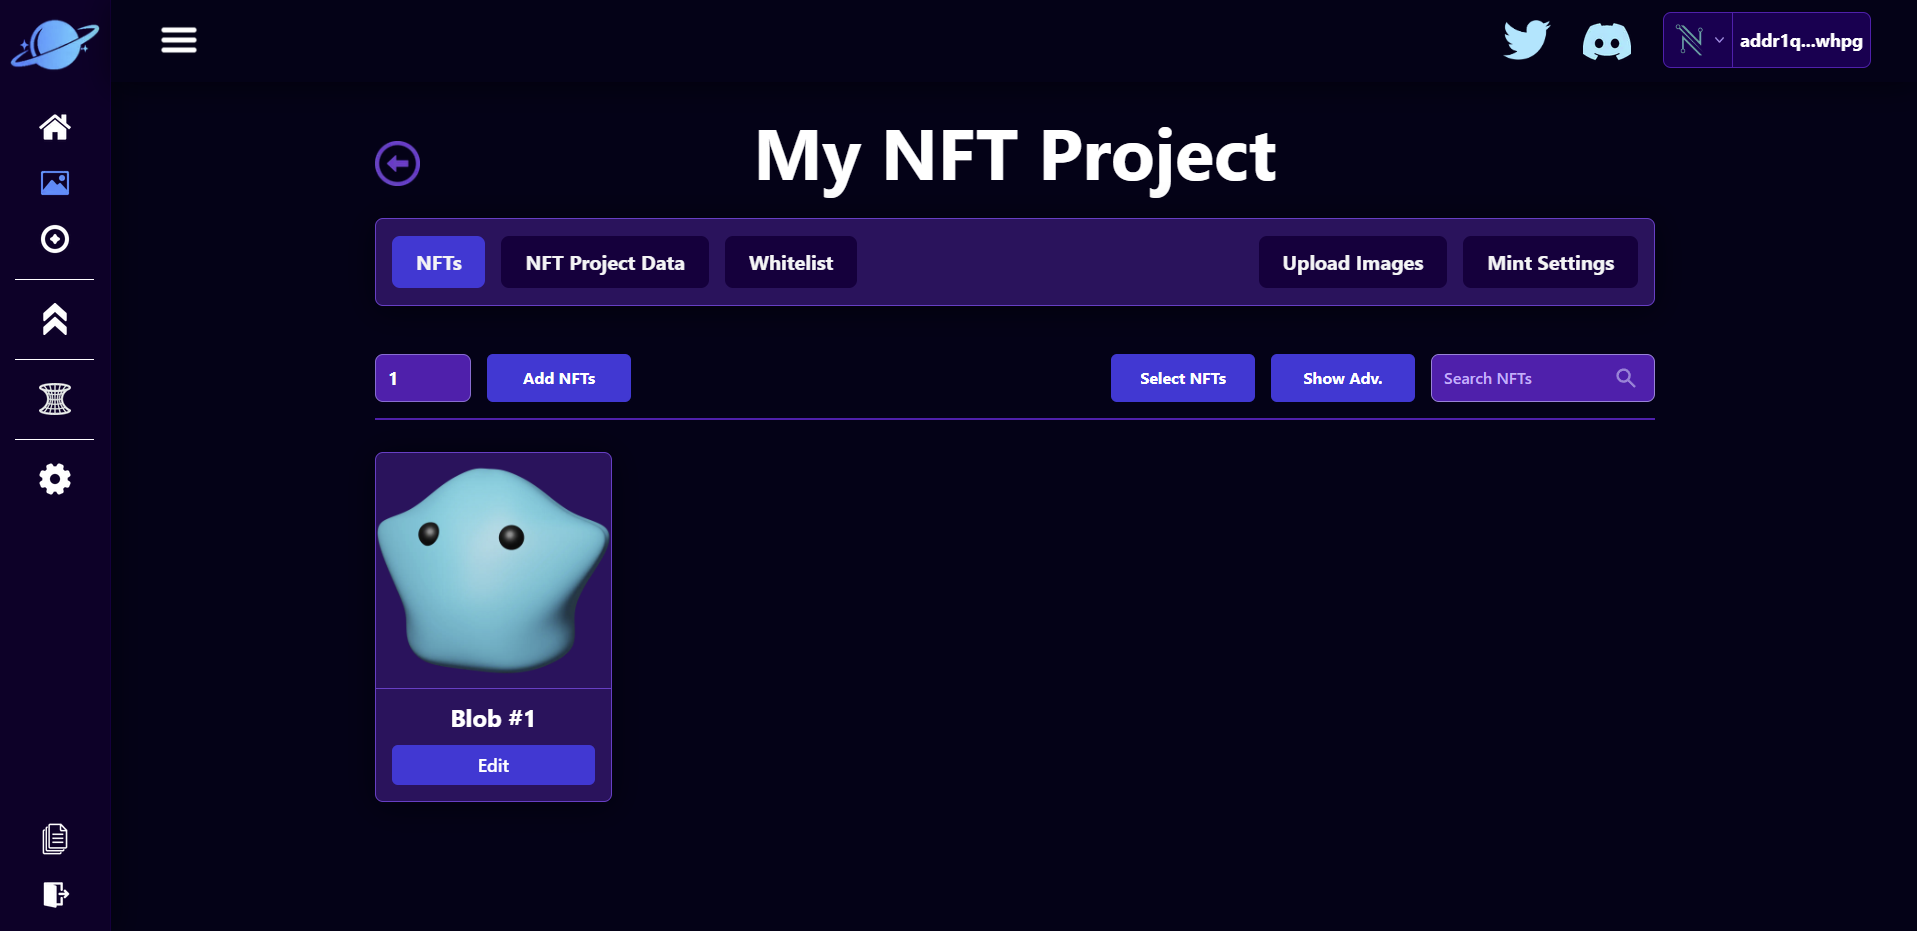
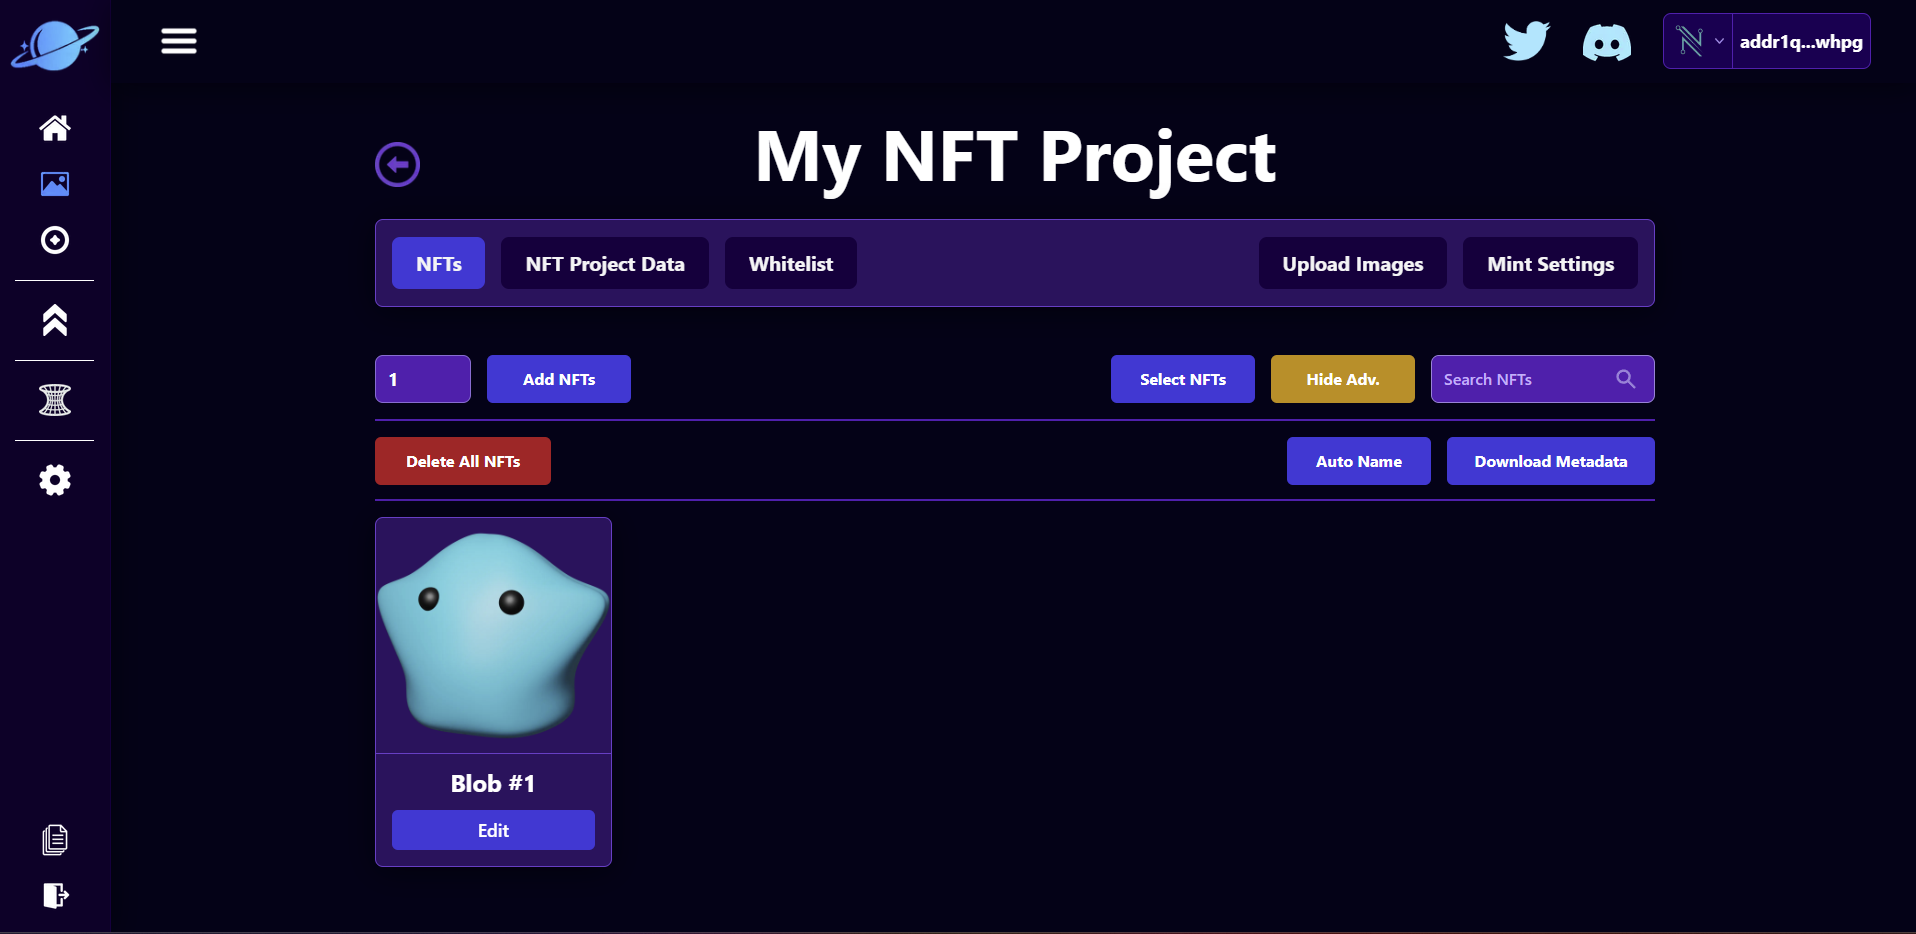
From here we do several things:
- We can delete the nft by clicking "Select NFTs", selecting our NFTs, and deleting the NFT.
- We can download our project's metadata by clicking on "Show Adv." and then clicking on "Download Metadata"
- We can auto name all nfts in our project to match our project name
In the next section we will go over our NFT Project Data!